.......... / shader / multichannel tutorial

Small multichannel rendering tutorial | Realsoft 3D 4.5

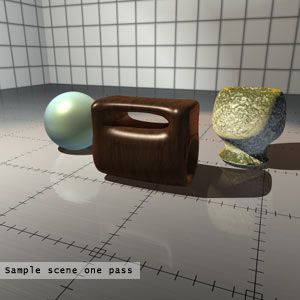
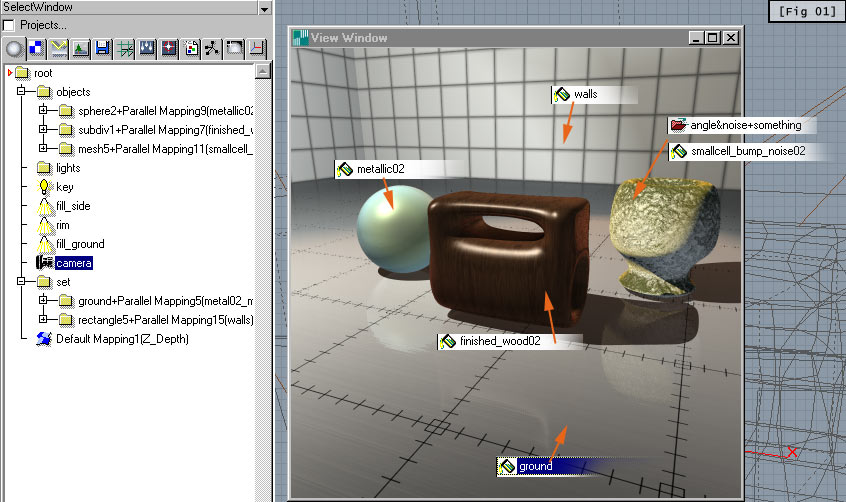
Download: [Sample scene with objects, shaders, channels, output objects, posteffects and rendersettings 50 kb]

This tutorial is not an all in one solution, but it shows some steps how you can access different channels in Realsoft to do a multichannel rendering for post editing in Photoshop or AE.

One Pass Render

The scene

For example if you have the following scene (some objects and an envoirment) and you need extra control on following passes:
  • Masks for the different objects (to color correct them later)
  • Specularity (to add some extra effect on specularity)
  • Reflection (to control the amount and sharpness of reflection)
  • depth (to fake DOF and fog)
Comment: There are serval ways to do this in RS3D, this tutorial shows only one possible solution.

The following tutorial shows step by step how to store these passes into different images. It's not the productive but more the easy to understand way ;-)

STEP 1 [setup the channels]
STEP 2 [the fun of masks]
STEP 3 [specularity]
STEP 4 [the reflection]
STEP 5 [the depth]
STEP 6 [lets render]
STEP 7 [post editing]
 

www.bt-3d.de
© BT-GRAFIK 
info@bt-grafik.de